bash <(curl -sSL "https://install.doctor/start")Desktop-as-Code,Batteries Included
as-Code
,Say goodbye to post-reformat headaches with Install Doctor! Restore your desktop in minutes using a simple one-liner, powered by your own secure git-stored config.
Blog
The Switch from Gas Station to Install Doctor
->
From Gas Station to Install Doctor
->
Multi-OS provisioning made easy.
Experience Install Doctor, the free, versatile provisioning tool that simplifies your system setup across multiple operating systems. Instantly provision devices with top open-source projects from GitHub, no customization needed. With its customizable framework, tailor your system effortlessly to fit your exact needs. Elevate your setup with Install Doctor—where efficiency meets simplicity.
Customize your build ->Install Doctor is a passion-project maintained by Megabyte Labs that aims to allow users to reformat daily without losing their desired state.

Get started easily.
01
Get started with a one-liner and guided prompts.
Getting started with Install Doctor is a breeze. Just launch the one-liner, and you'll be seamlessly guided through interactive prompts to easily input any additional details needed. Dive right in and experience the simplicity of setting up your system with Install Doctor.
iex ((New-Object System.Net.WebClient).DownloadString('https://install.doctor/windows'))qvm-run --pass-io sys-firewall "curl -sSL 'https://install.doctor/qubes'" > ~/setup.sh && bash ~/setup.sh02
Customize the script with your own fork.
Take control of your setup by forking the Install Doctor project on GitHub. Then, effortlessly provision your devices with the same convenient script, simply by setting an environment variable to include your username/project-name. It's your gateway to a customized, efficient provisioning process. Join the Install Doctor community and start shaping your ideal setup today!
export START_REPO="my-gh-user/my-fork-name"
bash <(curl -sSL "https://install.doctor/start")
$env:START_REPO = 'my-gh-user/my-fork-name'
iex ((New-Object System.Net.WebClient).DownloadString('https://install.doctor/windows'))export START_REPO="my-gh-user/my-fork-name"
qvm-run --pass-io sys-firewall "curl -sSL https://install.doctor/qubes" > ~/setup.sh && bash ~/setup.sh03
Test it out in a VM with Vagrant.
Dip your toes into the Install Doctor experience without any commitment! With just a one-liner, you can give Install Doctor a whirl before bringing it to your main workstations. This handy script effortlessly sets up Vagrant, checks for a compatible virtualization platform, and then smoothly provisions a virtual machine (VM) for you. It’s the perfect way to see Install Doctor in action, ensuring it meets your needs with zero hassle.
bash <(curl -sSL "https://install.doctor/vagrant")iex ((New-Object System.Net.WebClient).DownloadString('https://install.doctor/windows-vagrant'))04
Automate everything.
Elevate your security with Install Doctor by safeguarding your sensitive data. Opt to seamlessly integrate your confidential information through environment variables or embed them as encrypted secrets within your fork, ensuring a secure, automated one-line installation. This approach guarantees your setup is not just efficient, but also fortified against vulnerabilities, providing peace of mind in every deployment.
echo "Headlessly provisioning a Linux / macOS / Unix machine"
export HEADLESS_INSTALL=true
export SOFTWARE_GROUP="Standard-Desktop"
export FULL_NAME="Joe Shmoe"
export PUBLIC_SERVICES_DOMAIN="megabyte.space"
export CLOUDFLARE_API_TOKEN="cf-pat-xXP999kUu888777"
export TAILSCALE_AUTH_KEY="tailscale-auth-key-xXP999kUu888777"
export START_REPO="my-gh-user/my-fork-name"
bash <(curl -sSL "https://install.doctor/start")Write-Host "Headlessly provisioning a Windows machine"
$env:HEADLESS_INSTALL = true
$env:SOFTWARE_GROUP = 'Standard-Desktop'
$env:FULL_NAME = 'Joe Shmoe'
$env:PUBLIC_SERVICES_DOMAIN = 'megabyte.space'
$env:CLOUDFLARE_API_TOKEN = 'cf-pat-xXP999kUu888777'
$env:TAILSCALE_AUTH_KEY = 'tailscale-auth-key-xXP999kUu888777'
$env:START_REPO = 'my-gh-user/my-fork-name'
iex ((New-Object System.Net.WebClient).DownloadString('https://install.doctor/windows'))echo "Headlessly provisioning Qubes from dom0"
export HEADLESS_INSTALL=true
export SOFTWARE_GROUP=Standard-Desktop
export FULL_NAME="Joe Shmoe"
export PUBLIC_SERVICES_DOMAIN="megabyte.space"
export CLOUDFLARE_API_TOKEN="cf-pat-xXP999kUu888777"
export TAILSCALE_AUTH_KEY="tailscale-auth-key-xXP999kUu888777"
export START_REPO="my-gh-user/my-fork-name"
qvm-run --pass-io sys-firewall "curl -sSL https://install.doctor/qubes" > ~/setup.sh
bash ~/setup.sh05
Manage software across operating systems.
Simplify your setup with our custom installer, effortlessly defining package requirements across different operating systems. All you need to do is specify the OS-specific package names within a straightforward YAML file. It's the hassle-free way to ensure your software runs smoothly, regardless of the operating system. Easy, efficient, and effective—just how it should be.
---
softwarePackages:
  imagemagick:
    _bin: convert
    apk: imagemagick
    apt:
      - imagemagick
      - libx11-dev
    brew: imagemagick
    choco: imagemagick
    dnf:fedora: imagemagick
    scoop: imagemagick
06
Pin all your plugins, packages, and extensions.
Streamline your future setups with Install Doctor by pre-configuring it to automatically install your favorite packages. Simply define your preferences in a YAML file, and let Install Doctor take care of the provisioning for you. This one-time setup promises to save you countless hours down the line, making every device setup as efficient as the first. It's smart, simple, and designed to give you back your valuable time.
---
chromeExtensions:
  - automa/infppggnoaenmfagbfknfkancpbljcca
  - buffer/noojglkidnpfjbincgijbaiedldjfbhh
  - falcon/mmifbbohghecjloeklpbinkjpbplfalb
firefoxAddOns:
  - automa
  - buffer-for-firefox
  - chatgpt-for-google
  - firefox-translations
  - floccus
  - ublock-origin
07
Configure once, deploy headlessly in the future.
Some settings are not easily stored in code, like Google Chrome extension settings. Other settings are sensitive and should be encrypted (like API keys). Install Doctor allows you to store these settings in a secure, encrypted files that can be decrypted during the provisioning process. This way, you can keep your settings secure and your provisioning process automated after you are satisfied with your application settings.
# The following command will create backups of
# compatible application settings and store them
# in encrypted form in either S3 or the git fork.
run snapshot
Automatically provision your devices.
OS-independent
Bring your devices to roughly equivalent states, regardless of the operating system you choose.
Security-focused
Provision your devices with clever security measures that will mitigate security risks and give hackers a PITA.
Virtualization-friendly
Use Install Doctor to provision VMs, leverage pre-configured Docker sandboxing, and even provision a fully configured Qubes environment.
Consistent features, any operating system.
Explore Features->Stunning UI
Our custom theme brings a stunning visual experience to both KDE and GNOME Linux systems, ensuring a sleek interface. Additionally, the boot screens are streamlined, displaying only what's necessary, free from unnecessary log messages for a cleaner startup.
File System
Enjoy a secure, read-only network file sharing folder, effortless backups to S3 buckets, and seamless integration with operating system-specific technologies like BTRFS for enhanced performance and reliability.
Pin Everything
Our platform empowers you to customize your configuration to your exact preferences. Easily manage and maintain your favorite addons, tools, and extensions by pinning software packages, Chrome extensions, VSCode extensions, and more, ensuring everything you need is always at your fingertips.
Developer-First
The default setup is expertly crafted to meet the demands of developers, incorporating essential development software and advanced tools, including fully-enhanced terminal settings, to empower power users with everything they need for efficient workflow.
Notifications
Keep an eye on your devices with a personal web dashboard and stay informed with notifications the moment anything goes off track.
Network
Access your devices and services from anywhere through a VPN-based LAN and secure your web services with Single Sign-On (SSO) protection.
Multi-Layer Security
Enhance your security with multiple pre-configured layers, including app-specific firewalls, sandboxing, and honeypots, designed to protect your system comprehensively.
Configurable
Effortlessly create and host your personalized version of Install Doctor on GitHub, with the option to include your encrypted secrets for added security.
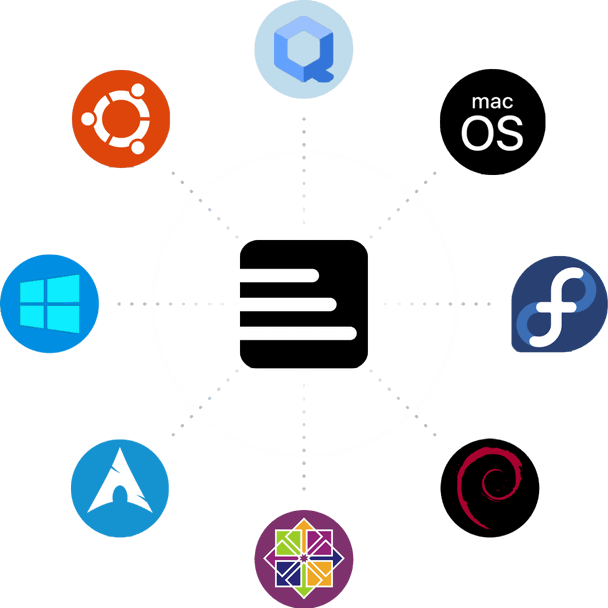
Bring your own operating system.
Leverage the power of Install Doctor to provision an impressive array of operating systems and virtualization platforms. Officially supporting the latest x86-64 releases from major players like Archlinux, CentOS, Debian, Fedora, macOS, Qubes, Ubuntu, and Windows, Install Doctor stands out in its versatility. Additionally, its capability extends to supporting other operating systems, showcasing its adaptability and wide-reaching applicability.


Supercharge your workflow with enterprise-grade solutions.

Ready for enterprise. Choose Install Doctor Enterprise for top-notch security, easy SSO, and exclusive read-only file system access. A smart investment in superior infrastructure protection.
Ready to get started?
Dive in and start provisioning your devices with Install Doctor